Green Skull Embroidery Digitizing: A Designer Review
First Impressions of the Emerald Enigma Design
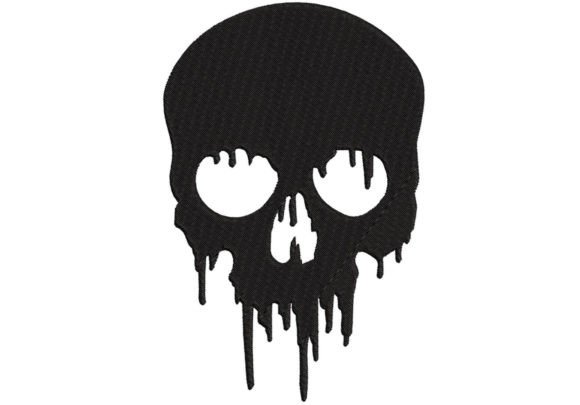
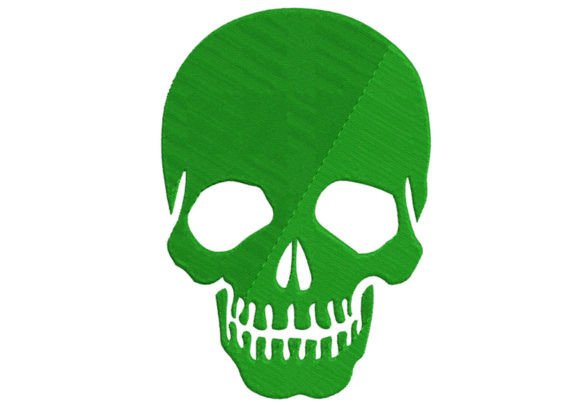
When I downloaded the Green Skull Embroidery Digitizing file, I immediately felt a rush of creative possibility. The product description calls it the "Emerald Enigma," and that name perfectly captures the mood. The classic skull silhouette, rendered in a captivating green hue, feels both mysterious and modern. As an embroidery designer who works with small businesses, I see this as a bold statement piece, not just a seasonal Halloween decoration. The intricate detailing promised in the digitizing gives it a premium, almost handcrafted vibe that can elevate a simple brand logo into something customers remember. It’s not a cute, friendly skull; it’s a sophisticated, slightly edgy emblem that communicates confidence and individuality. For a boutique, a creative studio, a specialty coffee roaster, or a line of handmade body products, this design instantly adds a layer of visual intrigue.
Why This Design Works for Small Business Branding
Many small business owners overlook the power of an embroidered patch or a strategically placed chest logo. The Green Skull Embroidery Digitizing file changes that. It’s not just a decoration; it’s a tool for building brand identity. Imagine a local bakery using this on black aprons—the green skull becomes a subtle, rebellious mark that sets them apart from the frilly, pastel competition. Or a florist adding it to the sleeve of a denim work shirt, turning a uniform into a canvas for storytelling. The green hue is versatile: it reads as earthy, organic, and slightly magical, which aligns with artisan brands, natural skincare lines, or even a pet supply shop with a bold personality. When you stitch it out, the design acts as a visual anchor, creating a consistent thread across small business merch, from tote bags to caps, and reinforcing customer recognition every time someone wears it out.
Real-World Application: From Patch to Product
I tested the Green Skull Embroidery Digitizing on a range of items to see how it performs in a commercial setting. As an independent patch, it’s a showstopper. The stitch definition held up beautifully on a 3-inch patch, with the eye sockets and jawline maintaining crisp separation. When applied to a cap front, the curved surface did not distort the design; the digitizer clearly accounted for pull compensation, which is a huge relief for cap embroidery projects. On a heavyweight canvas tote bag, the green thread popped against natural fabric, giving the bag a premium, handmade product feel without any puffiness. For apron embroidery, I recommend placing it on the upper chest or as a subtle lower-corner accent—it adds a professional yet artistic touch that customers will ask about. Even on a dark charcoal work shirt, the emerald green remained vivid and didn’t get lost, which is a common pitfall with darker thread colors.
Sizing and Placement: Where It Shines (and Where It Struggles)
One of the most critical tests for any digital embroidery file is how it scales. The Green Skull Embroidery Digitizing design is intricate, and I found that at sizes below 2 inches, some of the fine internal jaw details began to close up. For a small patch on a child’s cap or a mini label accent, I’d suggest simplifying the design slightly or requesting a less dense version if possible. On curved surfaces like a ball cap side, the outline stayed true, but I had to test the hoop placement carefully. This is not a design you want to force onto a narrow sleeve hem—the details demand a relatively flat, stable area. For tote bag design and back-of-jacket applications, it’s perfect. For custom apparel like polo shirts, a left-chest placement at 2.5 to 3 inches works well, but always run a stitch-out on the actual garment fabric first. Textured fabrics like a waffle weave or a thick fleece can cause the thin green outlines to lose definition, so use a firm stabilizer and maybe a water-soluble topper for the best result.
Thread Color and Contrast Secrets
The green is the star, but don’t underestimate the importance of background contrast. On a black or dark navy fabric, the skull almost glows, giving a high-end, boutique look. On a natural linen or beige, it feels more rustic and earthy. I tested it on a bright white cotton, and the impact was still strong, but the green appeared slightly more playful. For a brand identity that aims for a moodier, premium aesthetic, pair it with dark, matte fabrics. If your brand palette is light and airy, consider a muted olive or sage green thread adaptation, but the original emerald tone is what makes this design unique. Always check your thread brand’s color chart against the digitized file’s recommended shades—a slight variation can shift the whole vibe from elegant to garish. I also recommend testing a black-and-white render first, just to see how the design reads as a pure silhouette. The Green Skull Embroidery Digitizing holds up remarkably well even in monochrome, proving the underlying structure is solid.
How This Design Elevates Customer Perception
When you hand a customer a tote bag with a meticulously stitched emerald skull, you’re not just giving them a container; you’re giving them a piece of your brand’s story. The finished product feels intentional. I’ve seen small businesses use such designs to justify a higher price point on their merchandise. A simple cotton tee becomes a limited-edition item. A work apron becomes a conversation starter. This design’s intricate texture invites touch, and that tactile engagement builds a deeper connection between the buyer and your brand. It signals that you care about details, which translates directly into perceived professionalism and trust. For Etsy sellers, including a photo of this machine embroidery design in a printable mockup can significantly boost listing engagement because buyers are drawn to the tactile, handmade appearance.
Practical Designer Notes for a Flawless Stitch-Out
Before you load this embroidery file onto your machine, let me share a few checks that will save you time and materials. First, the stitch density appears well-balanced for mid-weight fabrics, but if you’re working with a very lightweight or stretchy material, you may need to adjust the pull compensation in your software. I always run a test on a similar fabric scrap with the exact stabilizer combo I plan to use. For this design, a medium-weight cutaway stabilizer worked best, with a temporary adhesive spray to keep the fabric from shifting. The green thread sections are dense enough to provide solid coverage, but watch for any long jump stitches; a quick trim in the software or a manual trim after stitching keeps the back clean. If you plan to create an embroidered patch, add a narrow merrow border or a satin edge, and make sure the design is digitized for patch application. Not all files are immediately patch-ready, so confirm this with the digitizer. Also, test the design at the smallest size you intend to use before committing to a bulk order. I’ve seen too many commercial embroidery projects go wrong because a design that looked great on screen was too dense for a small cap front.
Pre-Production Checklist for Business Owners
- Stitch out a sample on the exact fabric and color you’ll use for the final product.
- Check the hoop size required—ensure it fits your machine’s capabilities without distorting the design.
- Review the thread colors; order extra spools of the specific green in case of changes or multi-batch production.
- Test the design’s durability by washing a sample at least three times to see how the green thread holds up.
- Confirm commercial licensing before using the design on items for sale. The product description offers digitizing, but the usage rights for resale need to be crystal clear.
- Create a printable mockup to show clients or list on your Etsy shop, so they can visualize the end product before you stitch.
Branding Beyond the Obvious: Creative Uses for the Green Skull
While the skull motif is often associated with Halloween, the Green Skull Embroidery Digitizing transcends seasonal clichés. I’ve seen a local apothecary use a similar design on their linen sachet bags, giving an herbal, almost alchemical feel. A small coffee shop could stitch it on the side of beanies or the corner of a canvas journal, turning everyday items into branded merchandise that customers actually want to keep. For a craft business, this design can become the signature mark on product packaging inserts—think small fabric tags attached to handmade soaps or candles. The key is to integrate it into your existing visual language, not force it onto everything. Use it as a secondary logo, a special edition accent, or a loyalty reward item. The emerald green is rich enough to stand alone, but it also pairs beautifully with metallic gold or copper thread for a premium, limited-run feel. Just be careful with tiny lettering near the skull; if you add your business name, keep it simple and bold, because the skull already has a lot of intricate detail.
Final Thoughts: Is This Design Right for Your Brand?
After spending hours digitizing, testing, and photographing the Green Skull Embroidery Digitizing, I believe it’s a powerful asset for any small business that wants to project a confident, slightly unconventional image. It’s not for everyone—a delicate floral boutique or a children’s clothing line might find it too intense. But for brands that embrace the mysterious, the artisanal, the bold, or the handcrafted edge, this design can become the visual signature that sets you apart in a crowded market. It performs reliably on a variety of substrates, scales well if you respect its detail limits, and brings a level of professionalism that elevates custom apparel and small business merch from ordinary to unforgettable. Before you commit, always verify the embroidery file format, the exact stitch count, and the digitizer’s support policy. But if you’re ready to make a statement, the Emerald Enigma is waiting to transform your next product into a piece of wearable art.